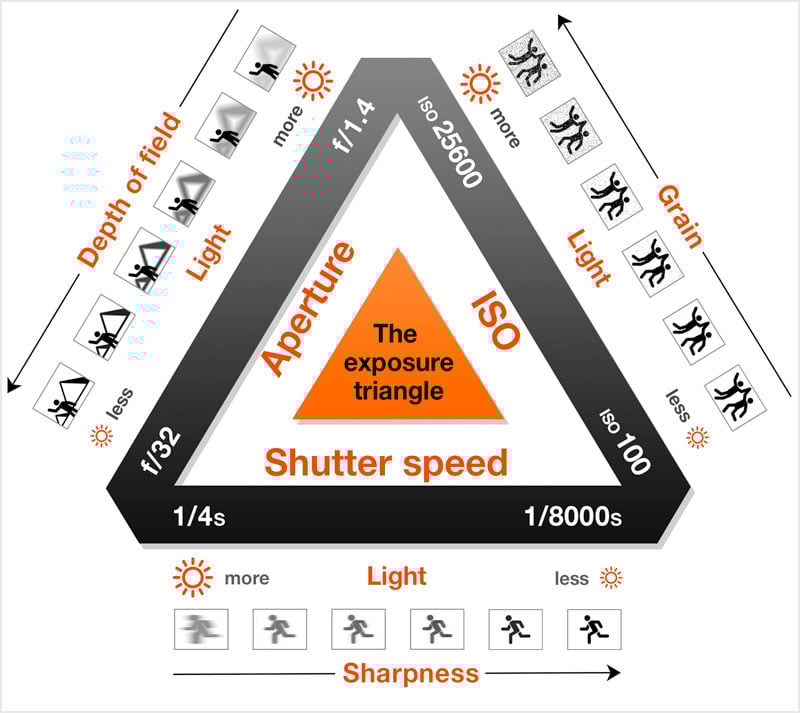
Exposure in photography determines how light or dark an image appears. It’s controlled by three key settings: aperture, shutter speed, and ISO, which together form the exposure triangle
Getting the right exposure in photography is like finding your balance when riding a bike. Without it, you won’t get the results you want. Mastering exposure from the start sets you up for success.
Three key camera settings affect a photo’s exposure: Aperture, Shutter Speed, and ISO. The challenge is balancing them for the right exposure.
- Aperture affects how much light enters the camera and also impacts the depth of field (the extent to which the image is in focus).
- Shutter speed controls how long the camera’s sensor is exposed to light, influencing motion blur.
- ISO adjusts the sensor’s sensitivity to light, which can brighten an image but may introduce noise.
ISO
Let’s start with ISO. It refers to your camera sensor’s sensitivity to light. Each ISO value represents a “stop” of light, influencing the light that reaches the sensor through the lens.
In photography, a stop refers to a doubling or halving of the amount of light that reaches the camera sensor. It is a unit of measurement used to describe changes in exposure. Adjusting any of the three elements of the exposure triangle—shutter speed, aperture, or ISO—by one stop either increases or decreases the brightness of an image by a factor of two.
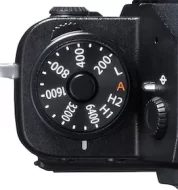
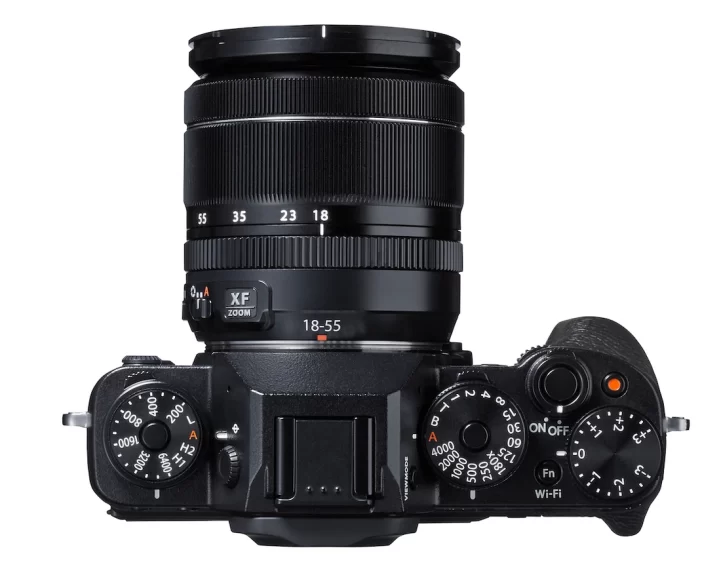
The ISO can easily be changed in your camera in the menu settings or on a dial.
A quick breakdown of the effects of each setting in the exposure triangle:
- Aperture: A low f-number (wide aperture) lets in more light and blurs the background. A high f-number (narrow aperture) darkens the image and keeps more in focus.
- Shutter Speed: Fast shutter freezes motion but darkens the image. Slow shutter allows more light but can cause motion blur.
- ISO: Low ISO keeps the image clean but needs more light. High ISO brightens the image but adds graininess.
Balancing these settings helps you achieve the best exposure for your shot!
Shutter Speed
Shutter speed is how fast your camera’s shutter opens and closes, controlling the amount of light that reaches the sensor through the lens.
Imagine a window with a shade. If you quickly pull the shade up and down, light enters the room for a brief moment—this is like shutter speed, which controls how long light reaches the camera sensor. The longer the shade stays open, the more light comes in. But the amount of light also depends on aperture, similar to how a bigger window lets in more light. Together, these settings help manage brightness in a photo! That window opening acted as the aperture, explained below.
Shutter speed is measured in seconds or fractions of a second, with each value representing a “stop” of light that affects exposure.
The counter-effect of shutter speed depends on how you adjust it:
- Fast shutter speed (e.g., 1/1000s) freezes motion but reduces light, making images darker.
- Slow shutter speed (e.g., 1/30s) allows more light but can introduce motion blur if the subject or camera moves.
To balance shutter speed, photographers adjust aperture (a wider aperture lets in more light) or ISO (higher ISO brightens the image but may add grain). This ensures proper exposure while maintaining the desired motion effect.
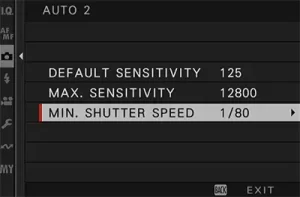
When shooting handheld, set your shutter speed to at least 1/60th of a second to avoid blur. Alternatively, use a shutter speed at least twice the lens’s focal length for sharper results. If possible, use a tripod to stabilize your camera and achieve even clearer images.
In photography, this concept is known as the reciprocal rule or shutter speed guidelines for handheld shooting. The reciprocal rule suggests that your shutter speed should be at least the inverse of your lens’s focal length to minimize camera shake—so for a 50mm lens, you’d use a shutter speed of at least 1/100th of a second.
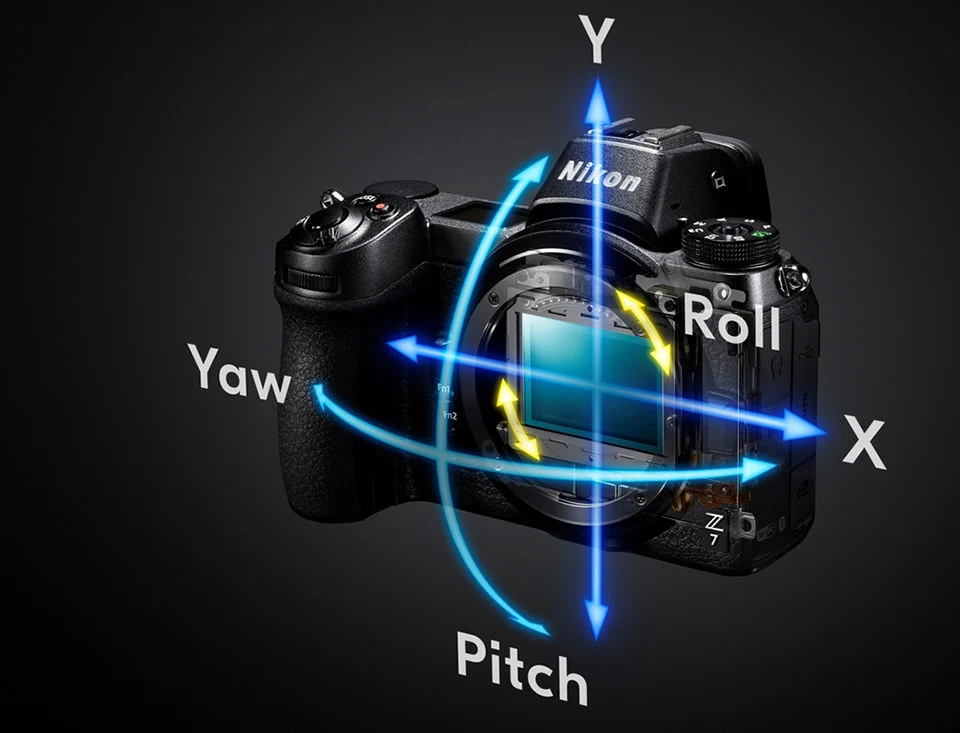
In-body and lens stabilization
When shooting handheld, even the slightest movements can introduce blur. This is where stabilization comes in—it helps counteract camera shake, allowing you to use slower shutter speeds while still achieving sharp images.
There are two main types of stabilization:
- In-Body Image Stabilization (IBIS) – Found in certain cameras, IBIS works by physically shifting the sensor to counteract motion. It provides stabilization regardless of the lens being used and is particularly useful for adapting older lenses that lack built-in stabilization.
- Lens-Based Stabilization (Optical Stabilization, OIS) – Built into some lenses, this system compensates for movement by shifting internal optical elements. It tends to work exceptionally well for telephoto lenses, where small shakes are more noticeable.
Some modern cameras combine both IBIS and lens stabilization, offering even greater stability. While stabilization helps reduce blur from hand movement, it won’t prevent blur from fast-moving subjects, so a higher shutter speed is still needed for action photography.
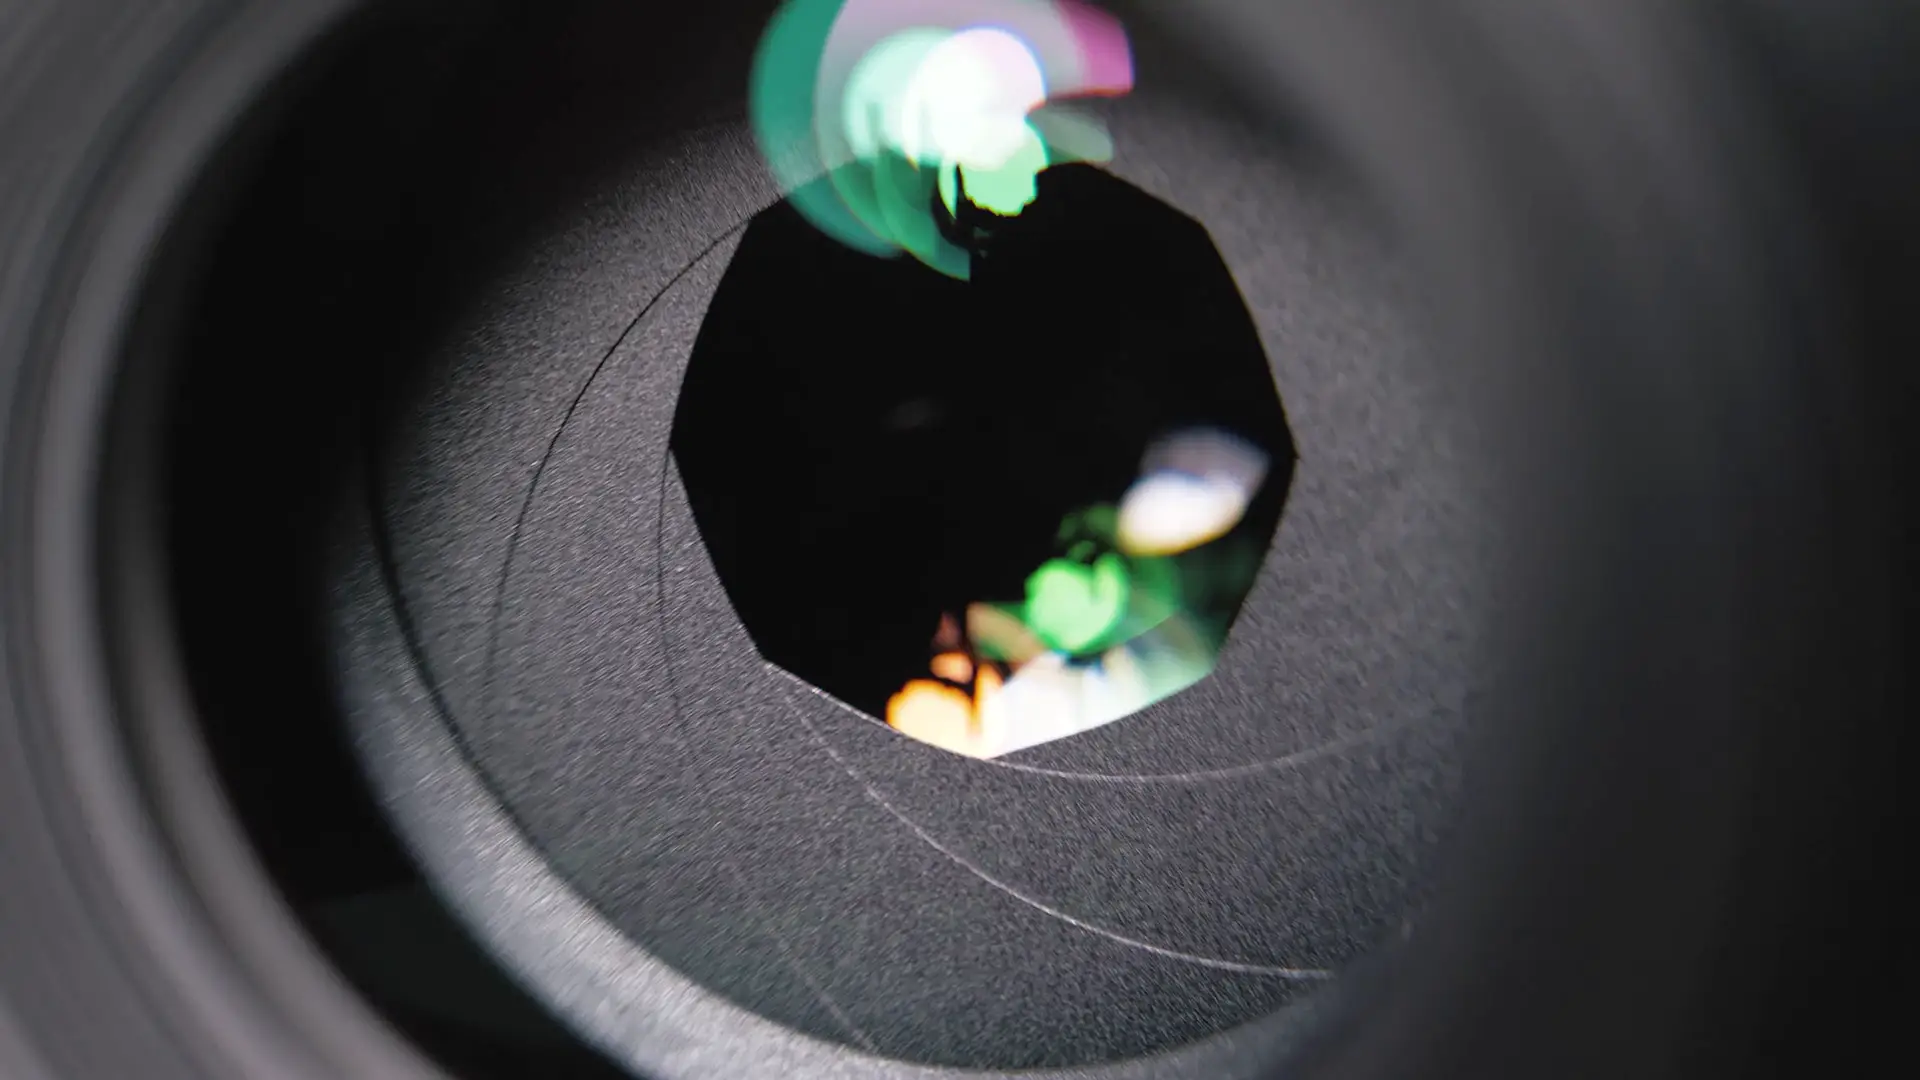
Aperture
Aperture refers to the opening in a lens that allows light to enter the camera. Understanding this concept is simple if you compare it to how your eyes function. As you transition between bright and dim settings, your iris automatically adjusts—expanding or contracting—to regulate the size of your pupil and control the amount of light entering.
Aperture plays a key role in shaping the depth of field in your photos, adding a sense of dimension. When set to a wide opening, it creates a soft, blurred background, highlighting the subject with a stunning shallow focus effect—an approach often used in portrait photography.
At the opposite end of the spectrum, a narrow aperture delivers crisp, detailed images from the foreground all the way to the distant horizon—a technique widely embraced by landscape photographers.
Moreover, the selected aperture significantly affects image exposure, determining the overall brightness or darkness of the final photograph.
How Aperture Affects Exposure
Aperture influences multiple aspects of photography, one of the most notable being image exposure. As the aperture size adjusts, it regulates the amount of light reaching the camera sensor, thereby determining the overall brightness of the photograph.
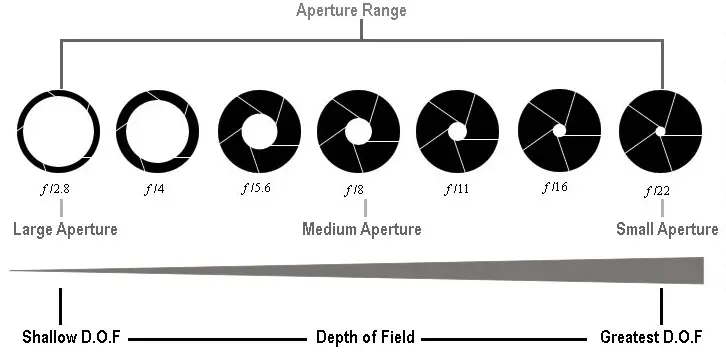
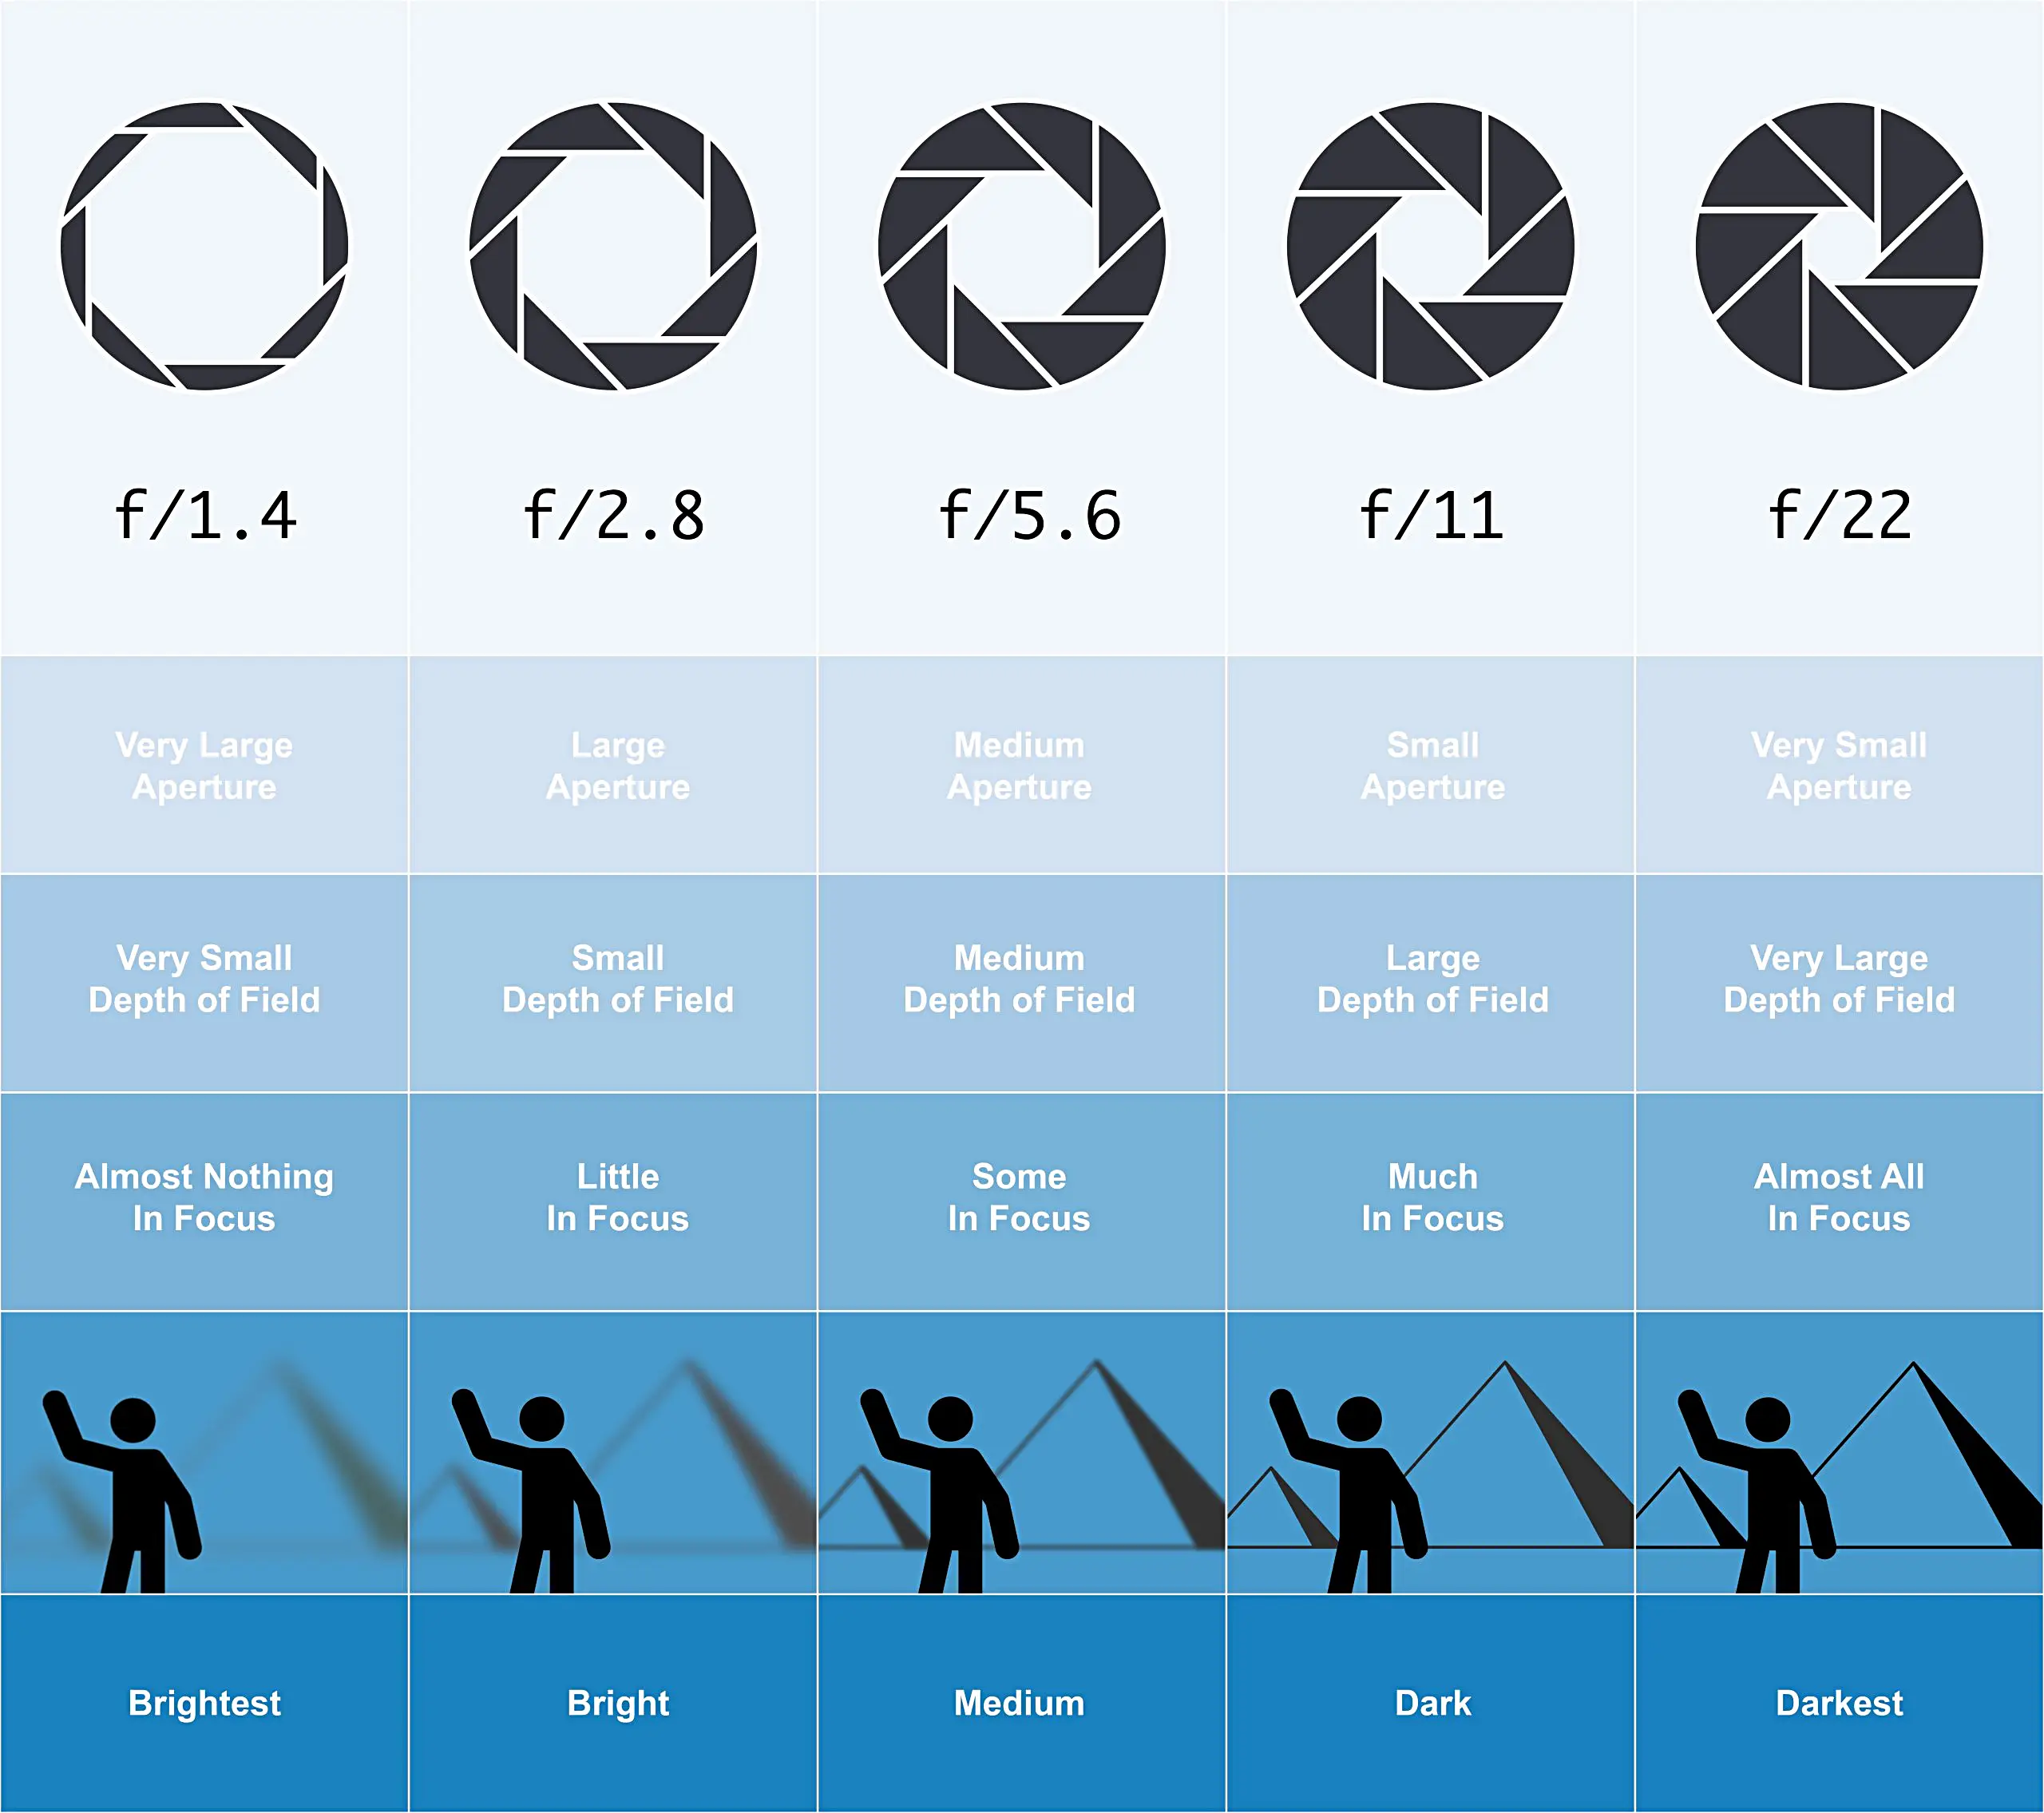
A wide aperture allows a substantial amount of light to pass through, producing a brighter image. Conversely, a narrow aperture restricts light intake, resulting in a darker photograph. Refer to the illustration below for a visual representation of its impact on exposure.
How Aperture Affects Depth of Field
Aperture also affects depth of field, which determines how much of a photo is in focus from front to back. A shallow depth of field makes the background blurry, while a deep depth of field keeps both the foreground and background sharp.
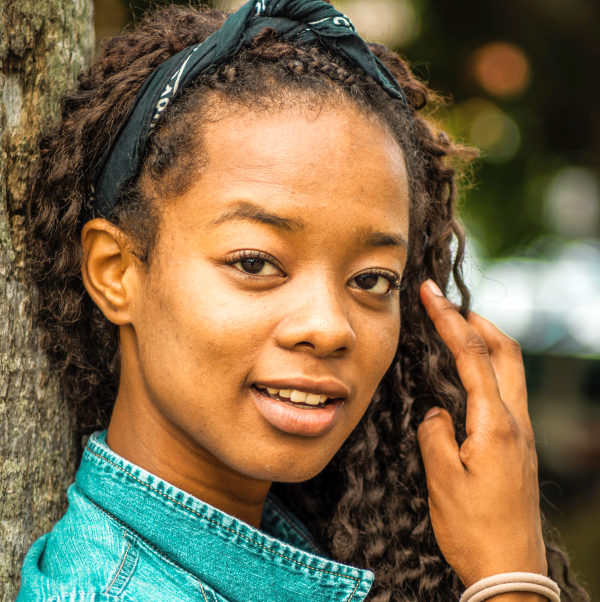
For instance, this image demonstrates a shallow depth of field.

In the image above, the girl remains sharply in focus, while the background is completely blurred. This effect is achieved through a large aperture, which creates a shallow depth of field—meaning the larger the aperture, the stronger the effect. This technique helps direct the viewer’s attention to the subject rather than a distracting background. With a narrower aperture, the separation between the subject and background would be less pronounced.
A useful way to remember this: a large aperture creates significant blur in both the foreground and background. This effect is ideal for portraits or photos where isolating the subject is the goal. You can also use foreground elements to frame your subject, which will appear blurred in contrast, as demonstrated in the example below.
The visual quality of blurred areas, known as “bokeh,” depends on the lens. Some lenses produce more pleasing bokeh than others, but nearly all can achieve a smooth, shallow focus effect when using a large aperture and positioning the subject close enough.
Conversely, a small aperture produces minimal background blur, making it well-suited for photography styles like landscapes and architecture. In the landscape image below, I used a small aperture to achieve sharpness throughout the entire frame, from foreground to background.
Tell us about your thoughtsWrite message